
call_center_whatsapp Call Center WhatsApp - Customer Engagement & Sales Automation
Complete Module Documentation
 Call Center WhatsApp
Intelligent Customer Engagement & Sales Automation
- Intelligent Customer Queue: Automatically prioritizes customers based on product replacement periods, purchase history, and agent availability.
- WhatsApp Integration: One-click messaging with customizable templates and dynamic placeholders (customer name, product, purchase date, etc.).
- Customer Response Tracking: Record customer responses (Bought, Not Interested, No Response, Answered - Insist) with mandatory message-sent validation.
- Follow-up Scheduling: Create calendar events for follow-up calls with configurable time ranges (Morning, Afternoon, evening) and automatic reminders.
- Quick Sale Generation: Create quotations directly from the call center form with pre-filled customer data and last purchased products.
- Product Replacement Tracking: Configure specific replacement periods for each product with flexible before/after windows (days).
- Agent Management: Dashboard with performance metrics, daily/total interaction counts, and role-based access control (Agent/Supervisor).
- ManyChat Integration: Detect ManyChat subscribers and sync contact information automatically.
- Security & Permissions: Agents cannot modify or cancel orders created from Call Center, ensuring data integrity.
- Comprehensive Reports: Track sales performance, conversion rates, customer interaction history, and agent productivity.
Configuration Steps
Install Call Center WhatsApp and open Settings ▸ Call Center ▸ Configuration. Define how many months of sales history the queue should analyse.
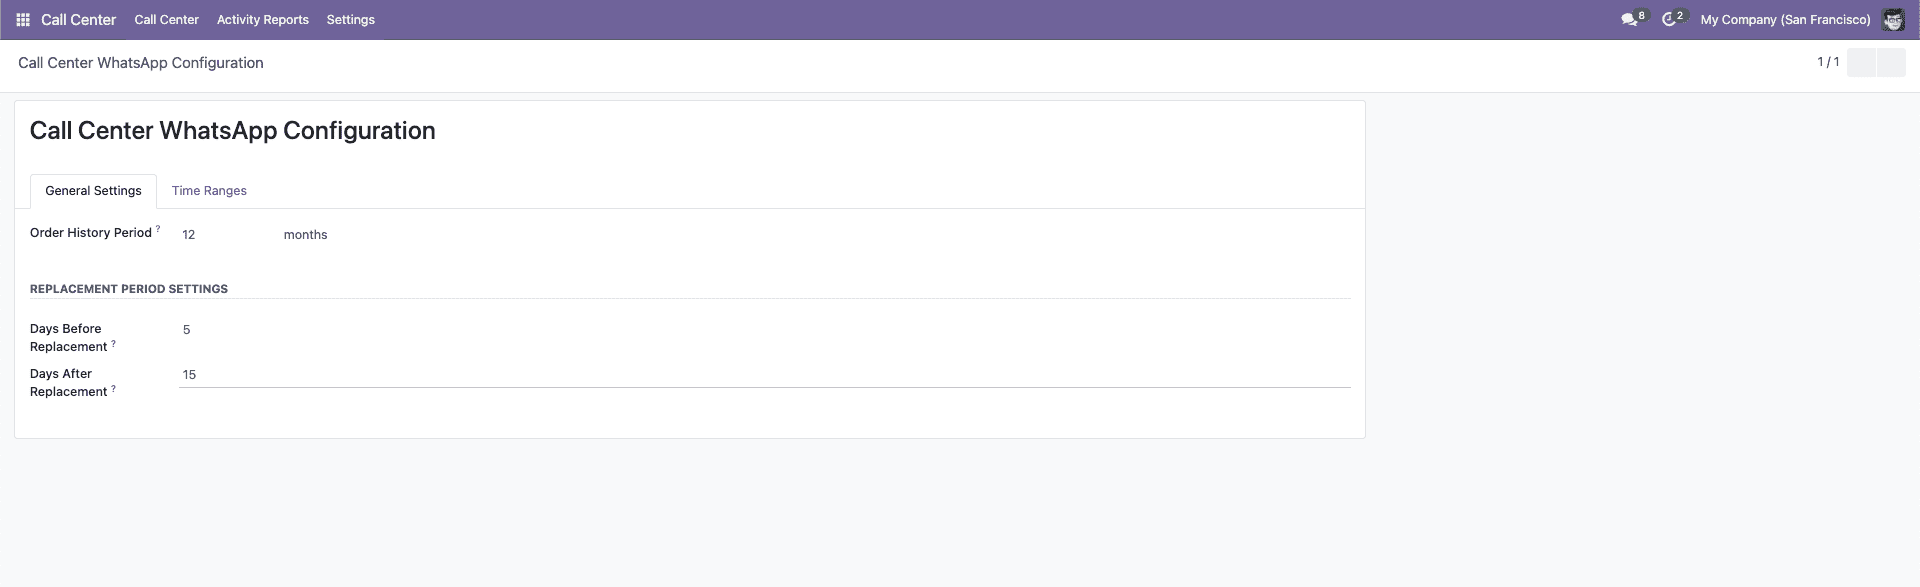
Open each Product Template that you want to monitor and tick
Tracked by Call Center.
Optionally set the Replacement Period (in months) – default is 12.
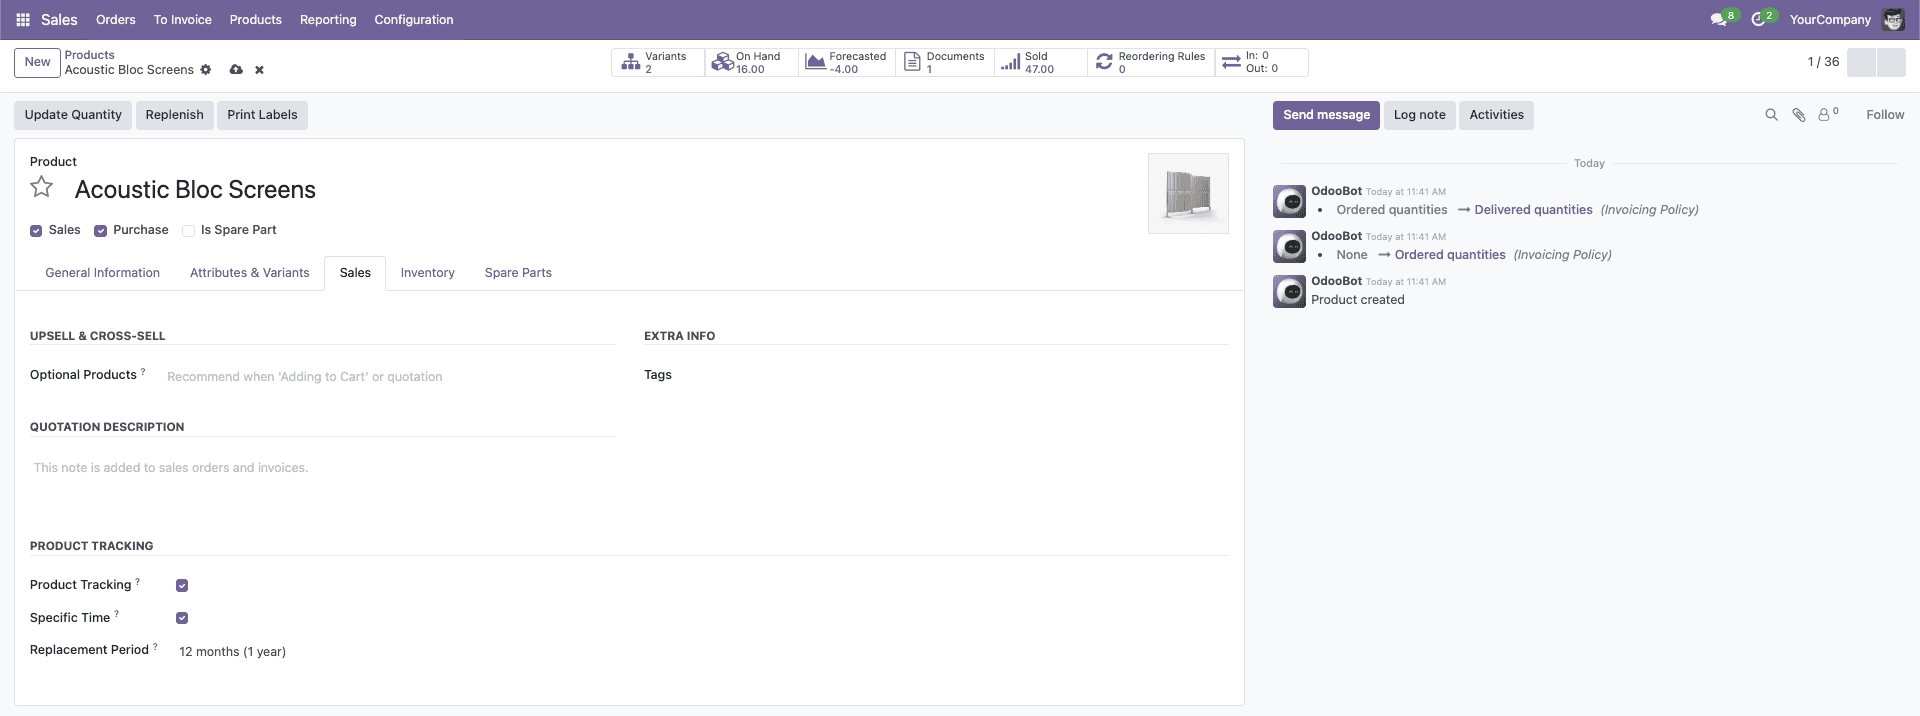
In the Configuration page, set the Days Before Replacement and Days After Replacement values. These define the window when customers should be contacted relative to their product replacement date. For example, with 5 days before and 15 days after, customers will be contacted starting 5 days before their replacement date is due.
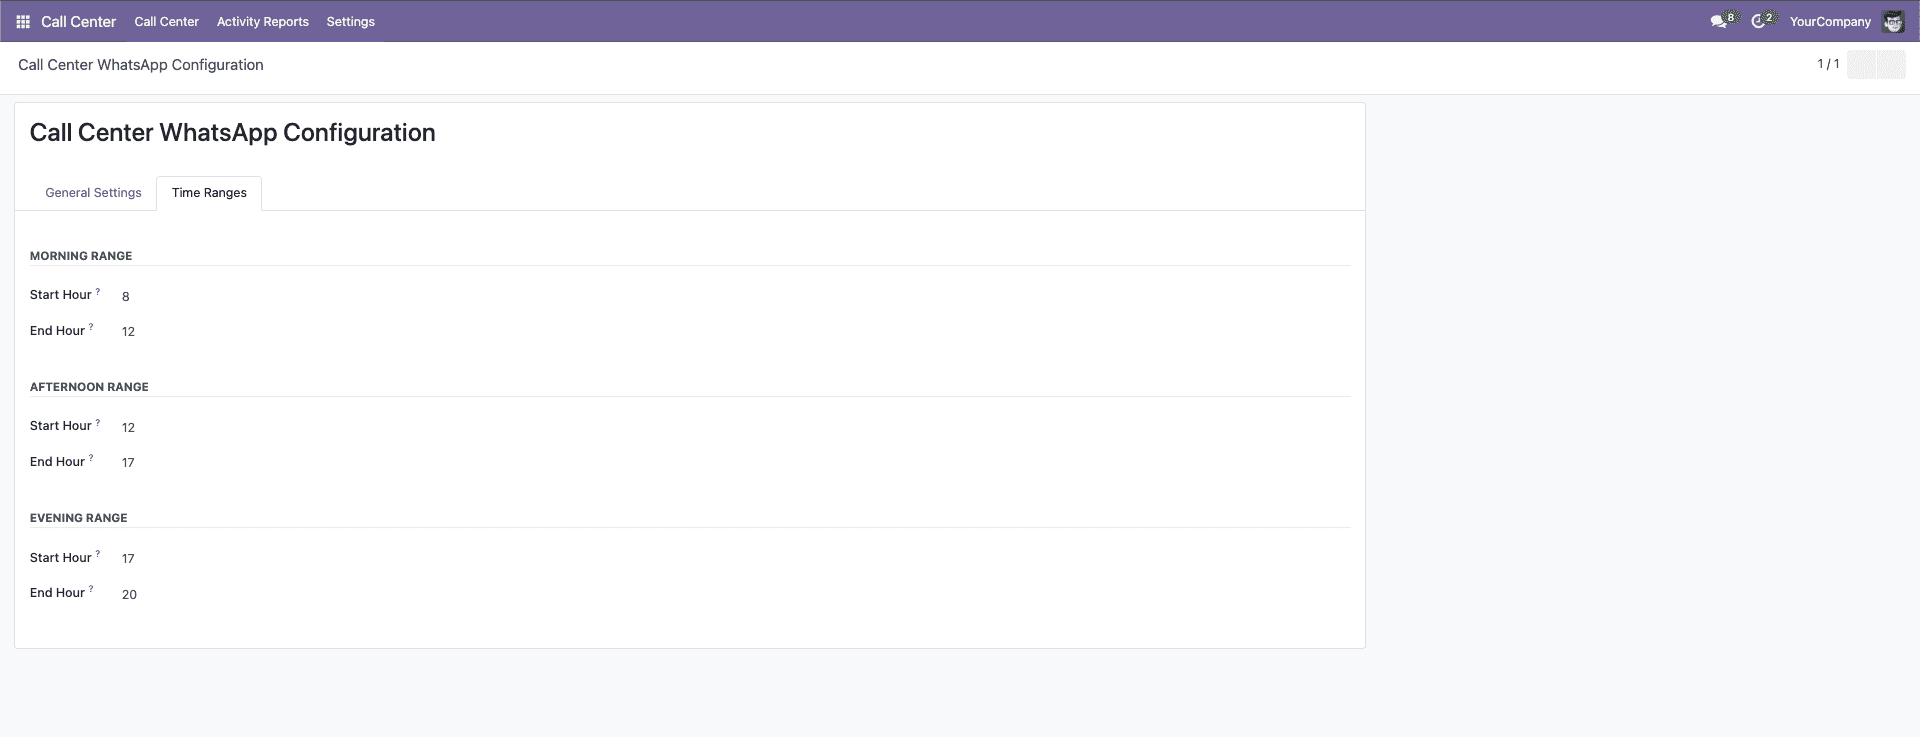
Set the time ranges for follow-up calls (Morning, Afternoon, Evening) in the configuration. These will be used when scheduling calendar events for customers who need follow-up calls.
Go to Settings ▸ Users & Companies ▸ Users and enable the flag
Is Call Center Agent.
Agents see the Call Center menu and can pick the next customer.

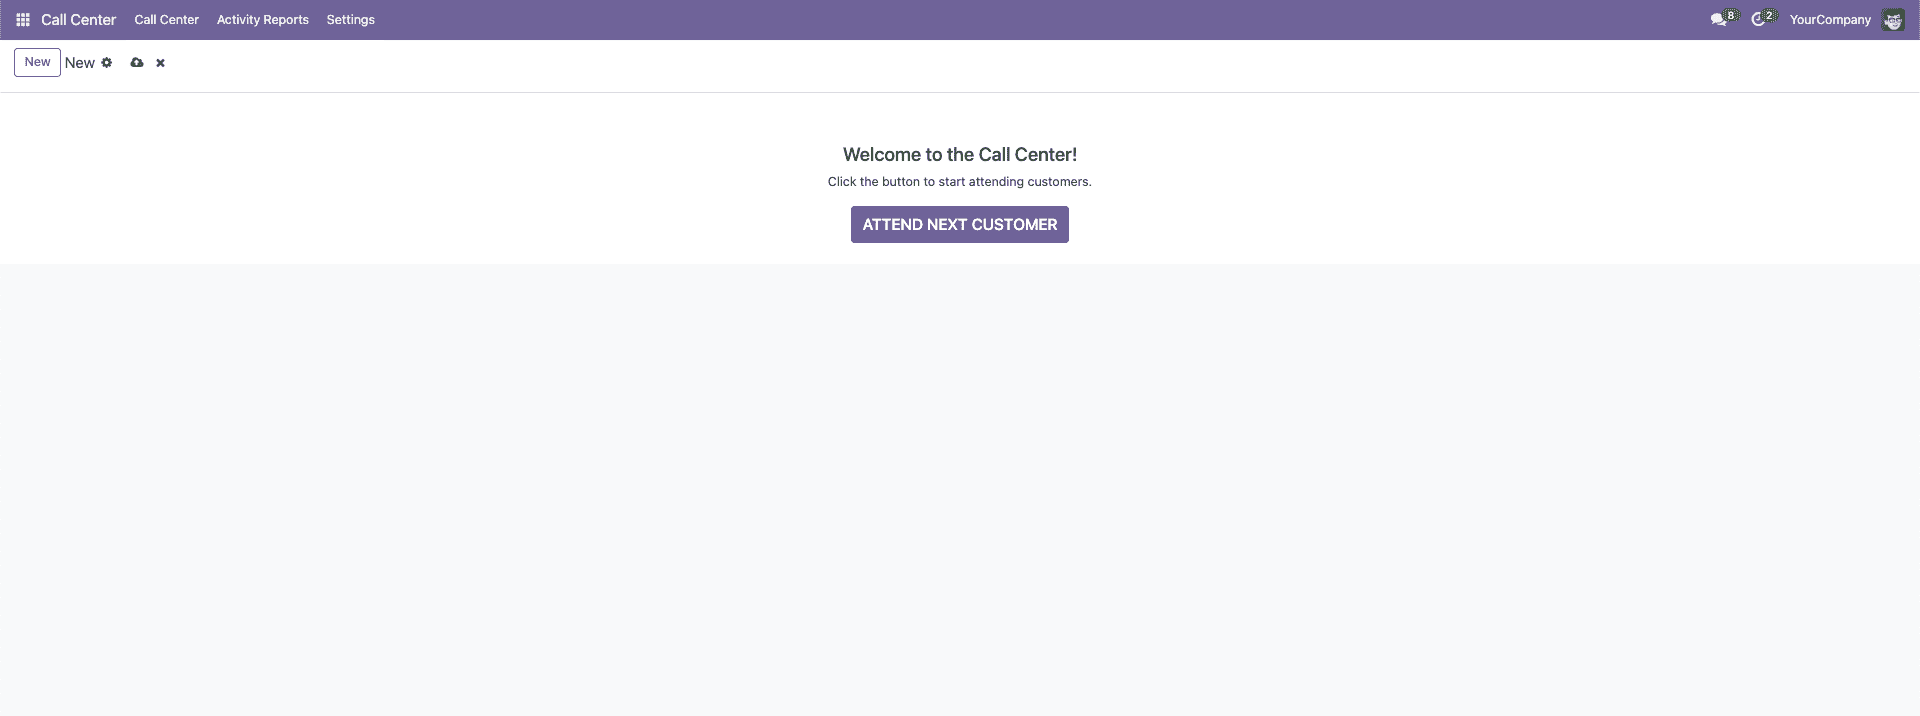
When you enter the Call Center module, you'll see the welcome screen. Click on the "ATTEND NEXT CUSTOMER" button to start attending customers. The system will automatically assign a customer based on the priority queue.
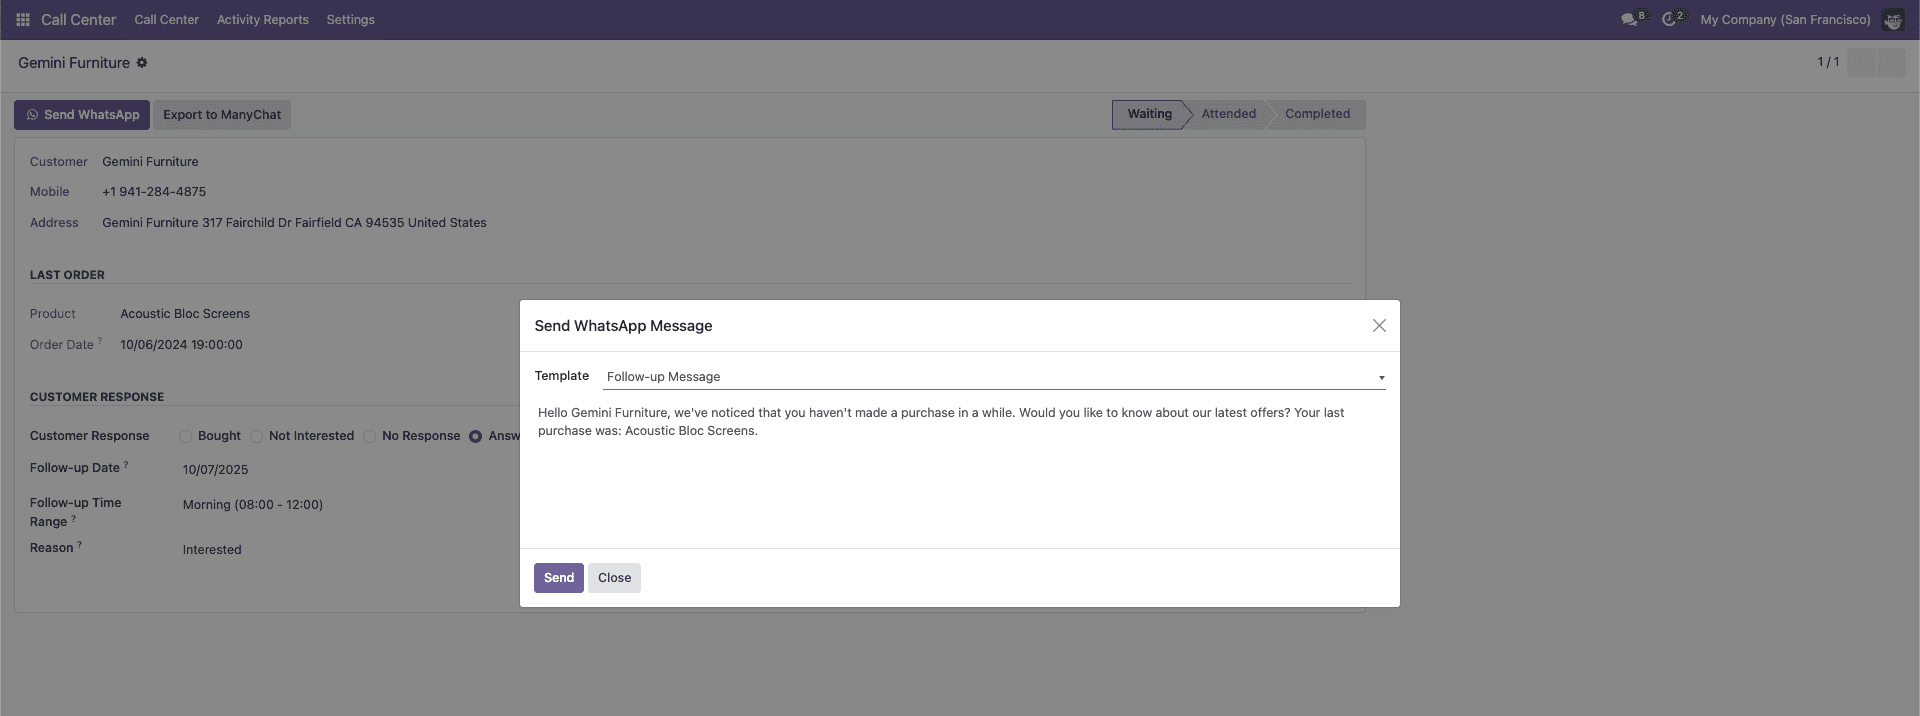
With the customer assigned, click the "Send WhatsApp" button to send a personalized message. Select the appropriate template and the system will automatically fill in customer data. This step is essential before proceeding with any sales action.
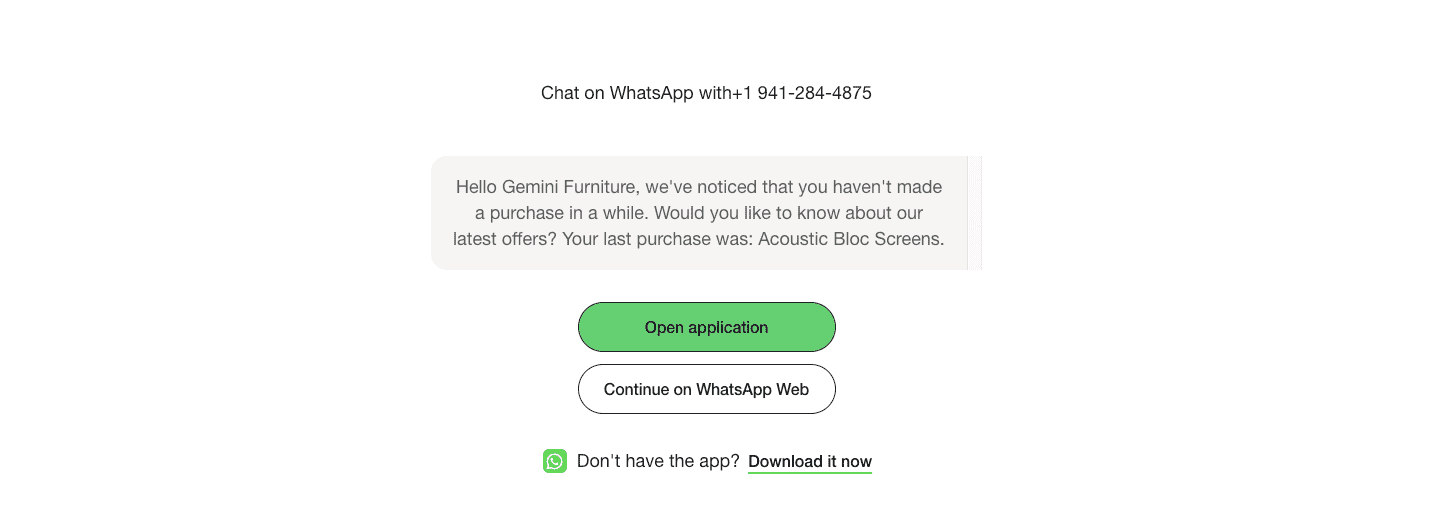

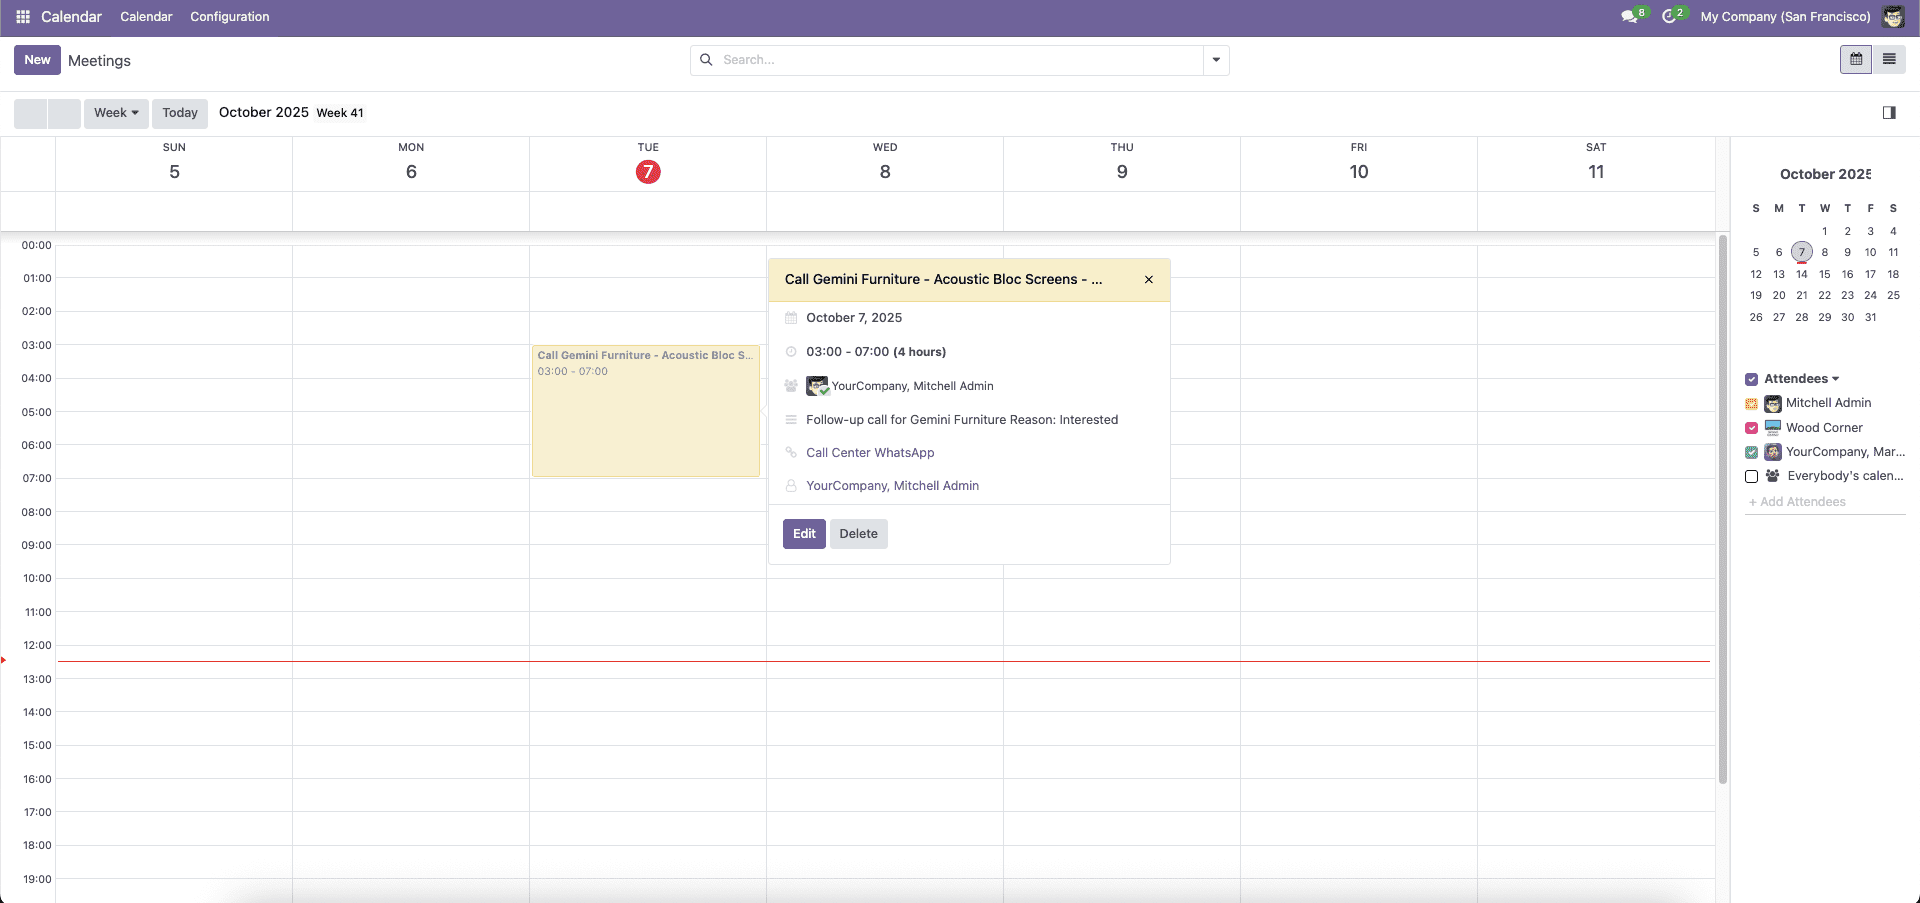
If the customer needs more time to decide, select "Answered - Insist" as the response type. This will allow you to schedule a follow-up call by selecting a date and time range (Morning, Afternoon, or Evening). The system will automatically create a calendar event with a reminder.
Once you've finished interacting with the customer, click the "Mark as Completed" button. This will register the interaction as completed and allow you to attend the next customer in the queue.
Need to integrate hardware with Odoo POS?
Custom module development, direct connection for commercial scales, thermal printers (IP/Bluetooth/USB), and local automation workflows.